
Before we get on How to Make a USB Drive Bootable and How to Use a Bootable Drive, lets us understating what booting is all about
What Is Booting?
Booting or Computer booting in generate is the process of starting a computer being initiated through hardware or software commands. With USB booting, it is a device that has been configured with a software program to allow a computer to start up from an external storage medium like USD flash
What Is a Bootable flash drive or USB drive?
A bootable flask disc or USB drive is any portable storage, which contains some certain files to boot a computer system. It is mostly used for recovering data (from hard drives), running diagnostic checks, and also installing or updating operating systems of a computer.
Without wasting much of our time, let us get some of the requirements needed to make a drive bootable
What is needed to make a USB drive bootable?
To be able to make a drive bootable, we need the following;
- A computer
- Good source of internet
- A USB drive (≥ 8GB)
- A bootable program
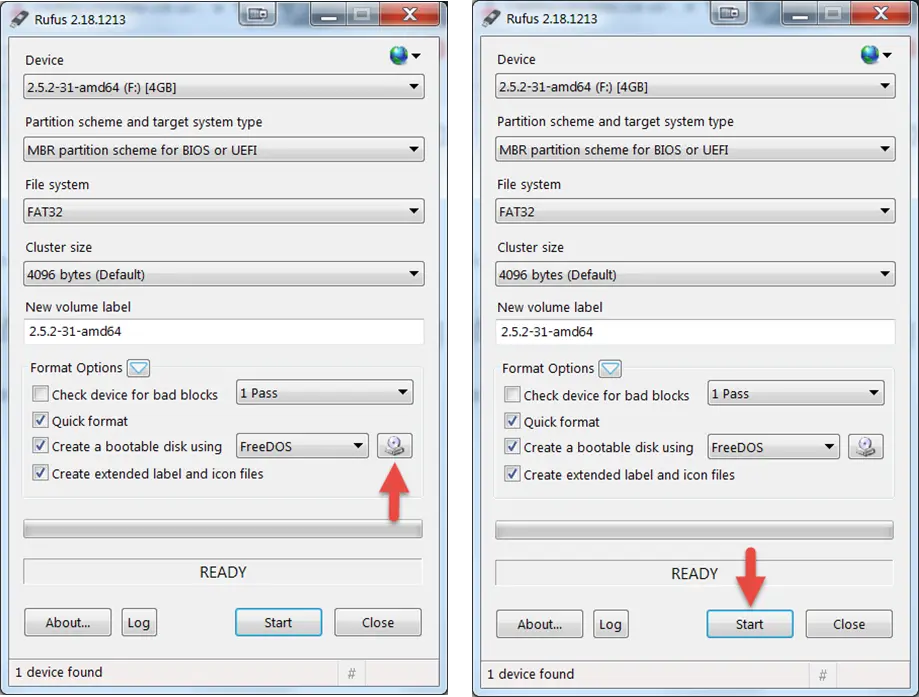
To proceed, we will be using Rufus as our disk image program
What Is Rufus
Rufus is a very lightweight. Open-source and portable Java application that helps with automating task on computers and also schedule them. It is best used for running scripts, backing up files and sending emails.
After having all the above, we will now proceed with getting the following ready
- Any ISO of your choice (windows 10)
- Most recent version of Rufus. Can be gotten here
- A USB drive (≥ 8GB)
Once everything is ready, we move on with the below steps
- Open the Rufus software program you download (no installations needed).
- Plug in your USB drive
- Rufus software will automatically detect eh drive. You can click on device and select from the drop-down the USB you want to use.
- Verify that the Boot Selection option is set to ISO or Disk image then click on Select. This will allow Rufus to open your file manager, navigate and locate the ISO image you want to incorporate on the USB.
- If everything else is good then click on Start
NB: Any data that was originally in the drive may be destroyed which is normal
Once the ISO image is done creating on your USB drive, you can then close it as you USB drive is now bootable.
Leave a Reply