
What Is Elementor Page Builder
Elementor is a simple drag-and-drop page builder for static and dynamic WordPress pages. Elementor is a plugin that helps create beautiful pages with the visual editor. Elementor allows you to control all parts of your pages. It is also made up of the pro version which is Elementor Pro which has some special functions.
To use Elementor to design a single product page you need to do the following
- Install Elemetor
- Install Elementor Pro
Installing Elementor And Elementor Pro
As always, to install a plugin you have to;
- log in to your WordPress Admin Dashboard
Go to Plugin Add New

2. At the right search bar, search for “Elementor Website Builder” By Elementor.com.
- Install and Activate
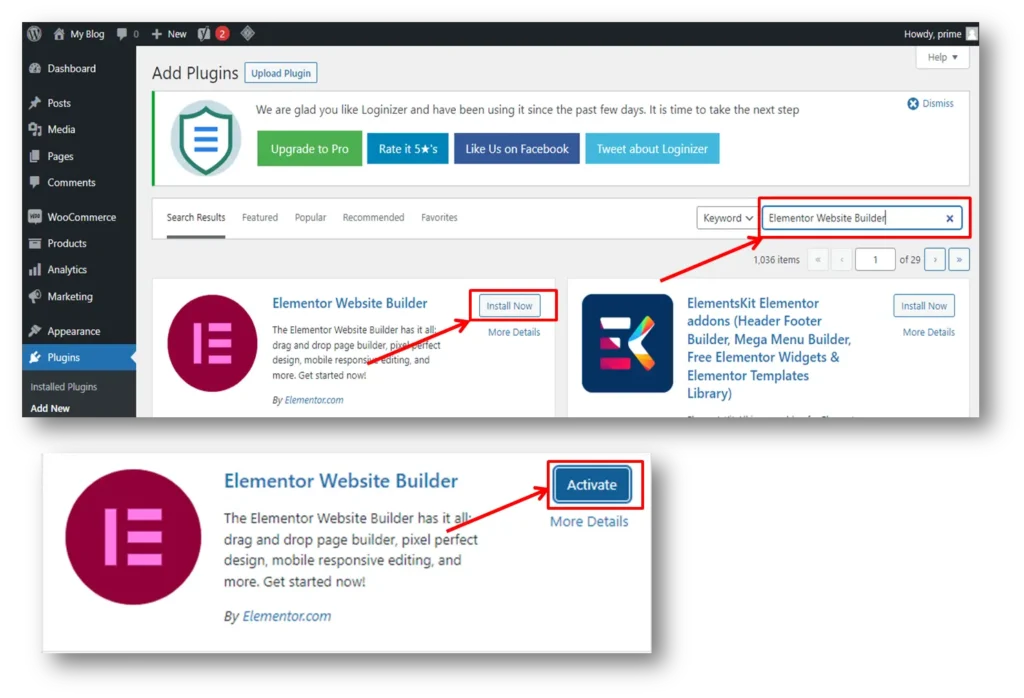
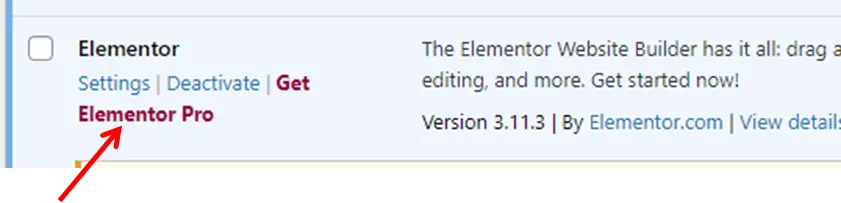
3. After Installing and Activating Elementor, you will have to go back to all PluginsInstalled Plugins
- Fine Elementor and click “Get Elementor Pro“. Purchase Elementor Pro from the official Elementor website. Install the Elementor Pro and Activate it to proceed or if you have the Elementor Pro plugin on your computer, all you need to do is click on “upload plugin”..
4. Go to PagesAll Pages
- Select a page and click on Edit With Elementor. You can also create a new page.

- Now allow Elementor to load!
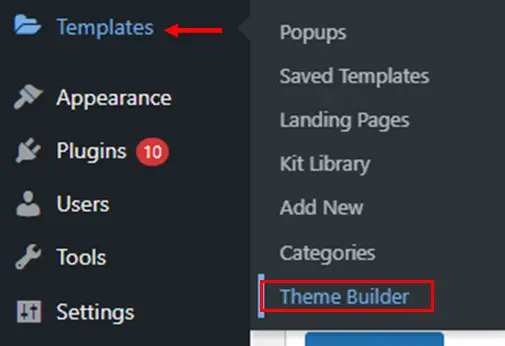
- Alternative: You can equally hover on Template on your WordPress dashboard and select Theme Builder. This will take you to straight to the theme builder page without having to pass through another page.
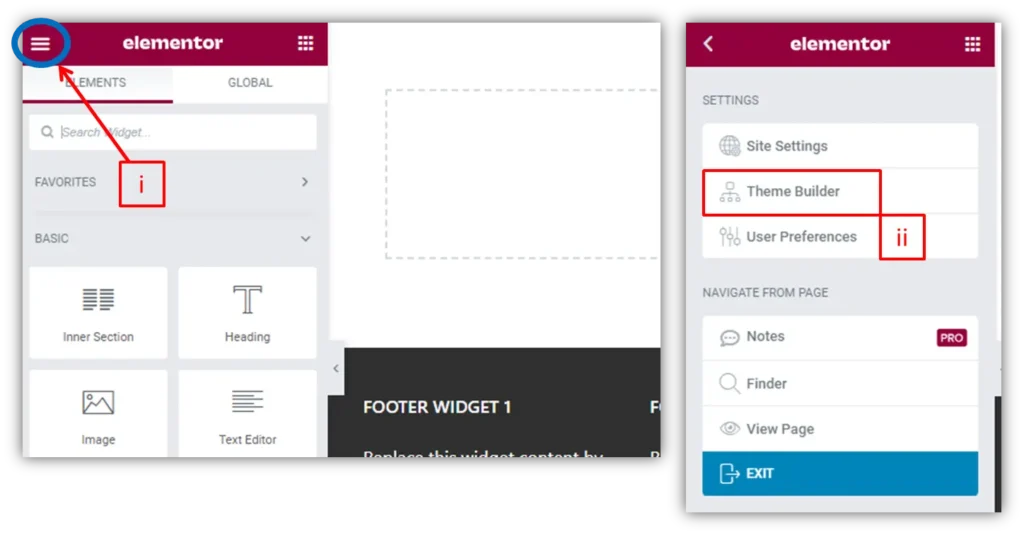
5. You should have the below Elementor builder board.
i) Click on the Three (3) horizontal lines at the Top Left.
ii) Select “Theme Builder” and allow the page to load.
- You will find a whole new world of designs here. Many in which you can choose from, be it for a single post, footer, header, etc.
Note
Without the Elementor Pro, Most of these features will not be seen or will have locks on them.
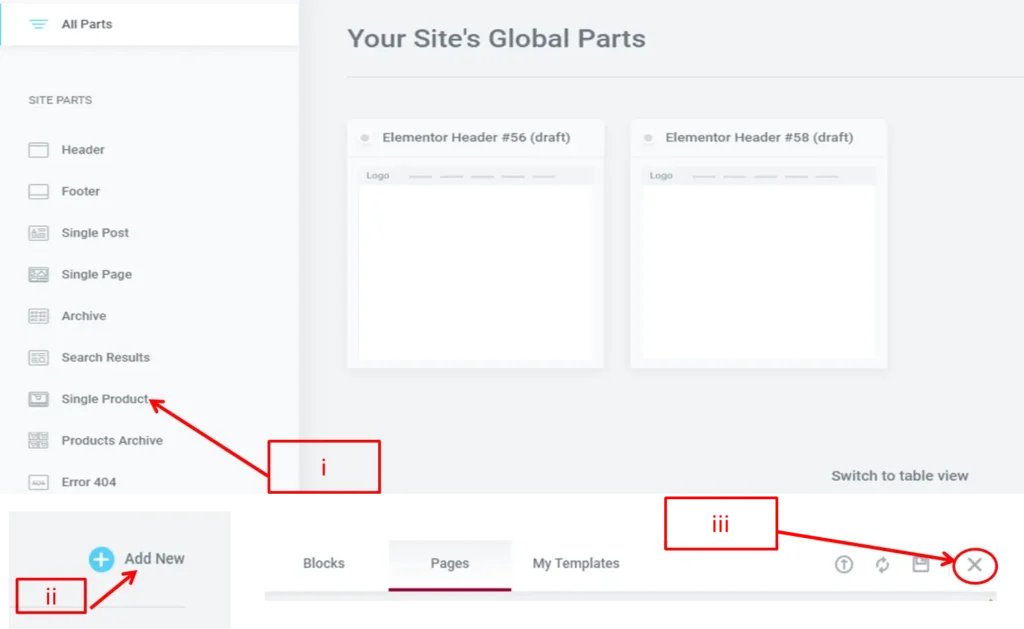
6. Since we are focusing on a single product page, we’ll proceed with it.
i) Click on Single Product
ii) Click on Add New at the top right
iii) Click The x
Assuming you know how to design pages, Post, And Create content using Elementor Page Builder, we are going to be doing drag-and-drop to fully customize our single product page with Elementor Page Builder
NOTE THAT TO BE ABLE TO BUILD SINGLE PRODUCT PAGES, MAKE SURE YOU ALREADY HAVE EXISTING PRODUCTS ON YOUR WEBSITE, IF NOT THEN YOU CAN SIMPLY UPLOAD A FEW PRODUCTS TO YOUR WEBSITE IN OTHER TO WITNESS THE POWER OF THIS PLUGIN.
- On the left sidebar are the tools to be used. By simply drag-and-drop you get an awesome single product page.
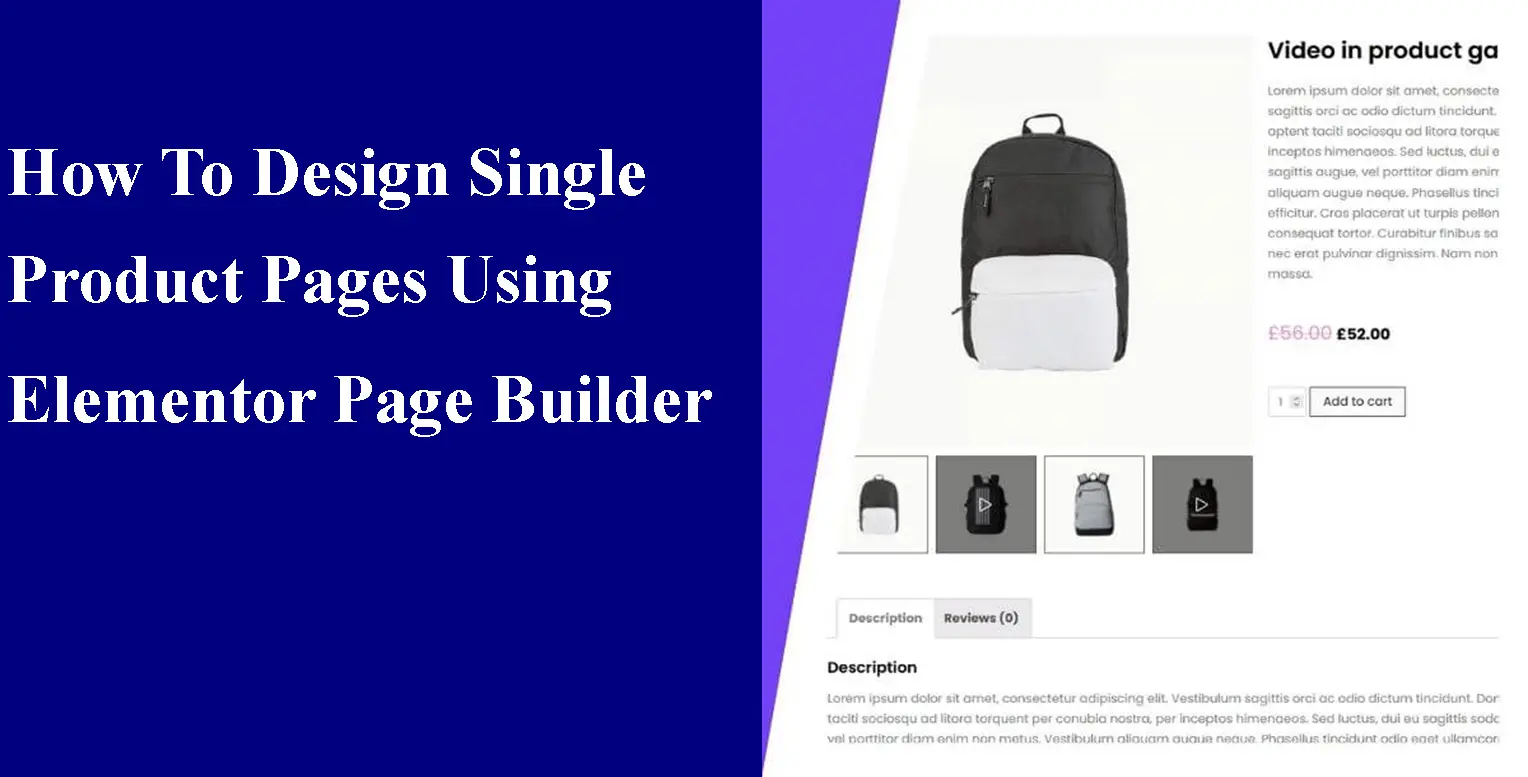
Building A Single Product Page
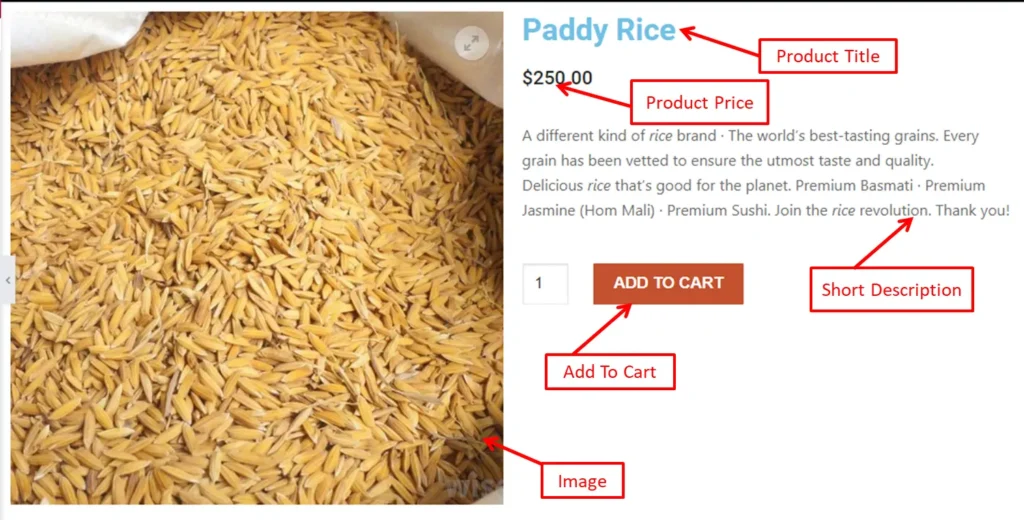
You need to have a picture of how your single product page should look like. for a start we are going to build a single product page comprising of;
- Product image,
- Product name,
- Product price,
- Short description,
- Product description,
- Add to cart button
The Product image, is at the left, the product name, product price, short description, and add to cart at the right, and finally product description at the bottom.
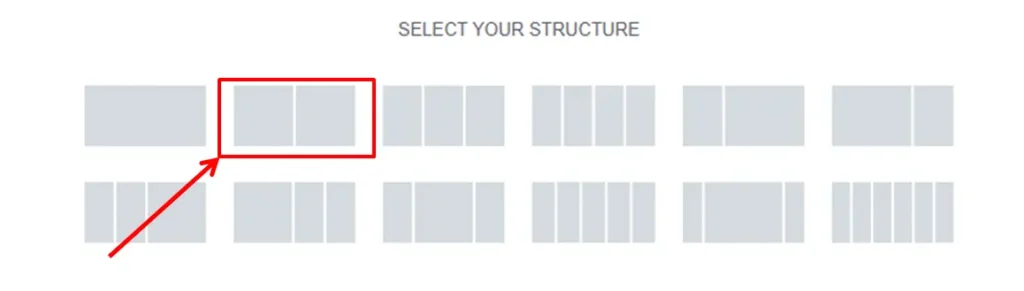
- Firstly, select the required column. Here we select two columns.
- Carry the “Product image” at the left sidebar and drop it inside the first column. Click on the 9 dots (
) at the left top sidebar to go back.
- Now, drag and drop the “Product Title” in the next column (right).
- Drag and drop the “Product Price” below the “Product Title”
- Drag and drop the “Short Description” below the “Product Price”
- Drag and drop the “Add To Cart” below the “Product Price”. That leaves the product title, product price, and add to cart in the column right.
You should have the below screenshot now.
- Done with that section. Add a new row with just one column.
- Drag and drop the “Product Content” inside.
- Do all necessary styling to make your single product page look creative.
If you wish to add “Related Product” to display at the bottom, then do the following
- Add a new column with one row.
- Drag and drop the “Product Related” inside it.
- Now all related products will be displayed below.
- Do some styling to have a creative page.
Saving The Single Product Page
- Click Update at the bottom left (green button)
- Click Add Condition.
- Set Condition to “Products“
- Click “Save & Close”
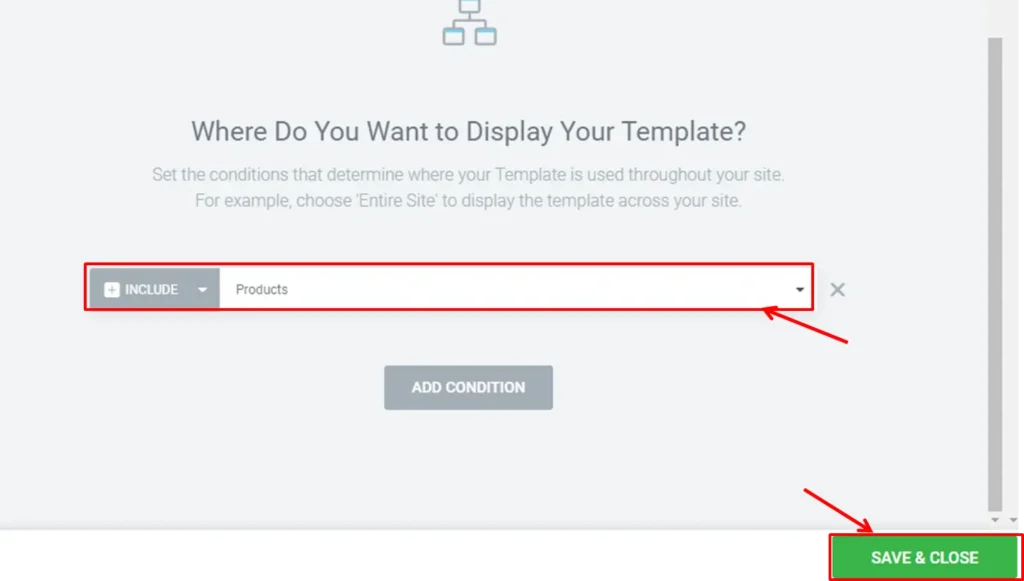
NB: Here, you can Include and Exclude certain pages, products, etc, to display.
You can now view your work on any product in the shop. Depending on your styling, you should be able to see the below screenshot.
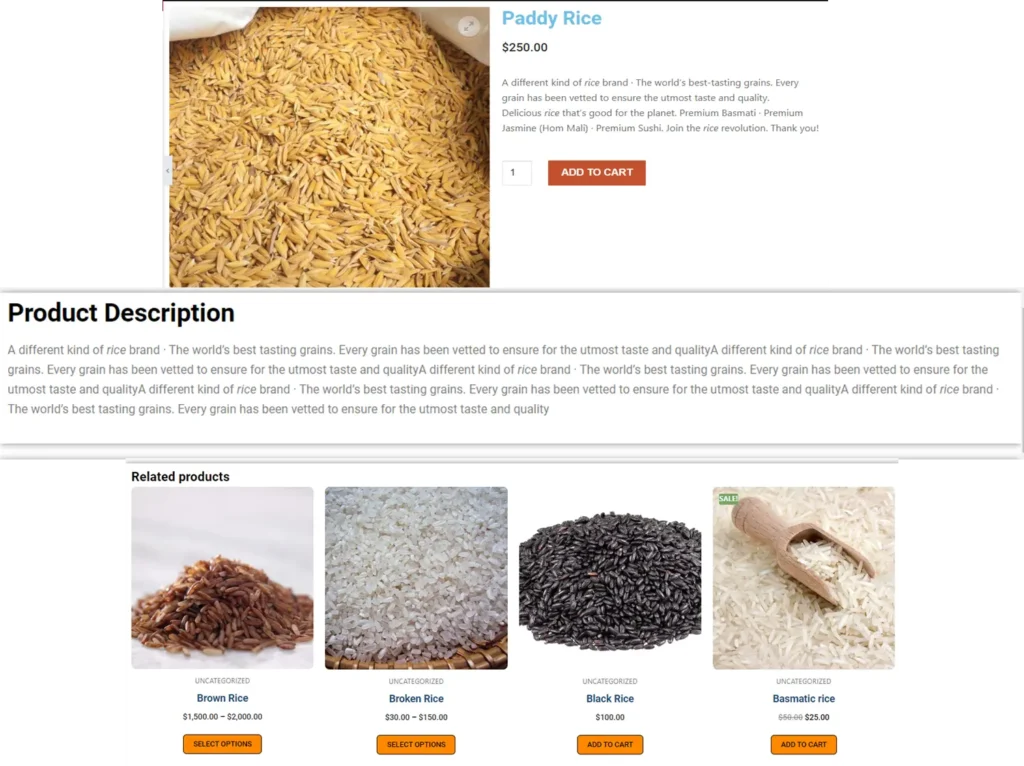
The left sidebar contains all the features that will make your single product page creative and satisfying. Go more practice with other related single product pages as you wish.
Leave a Reply